


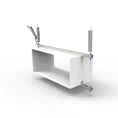


Hey there! I'm a supplier of cable tray accessories, and today I'm gonna walk you through how to install cable tray cable management clips as accessories. These clips are super handy for keeping your cables organized and in place, and they're an essential part of any cable tray system.
Why Cable Management Clips?
Before we dive into the installation process, let's quickly talk about why cable management clips are so important. When you've got a bunch of cables running through your cable tray, they can easily get tangled, which not only looks messy but can also lead to problems down the line. Tangled cables can be difficult to troubleshoot, and they might even cause overheating or signal interference.
Cable management clips help prevent all these issues. They hold the cables securely in place, making it easier to identify and access specific cables when needed. Plus, they keep the cables neatly arranged, which can improve the overall aesthetics of your cable tray system.
Tools and Materials You'll Need
To install cable management clips, you'll need a few basic tools and materials:
- Cable management clips: Obviously, you'll need the clips themselves. Make sure you choose the right type and size for your cables and cable tray.
- Screwdriver: You'll need a screwdriver to attach the clips to the cable tray. The type of screwdriver you need will depend on the type of screws used with the clips.
- Measuring tape: This will come in handy for measuring the spacing between the clips to ensure they're evenly distributed.
- Safety glasses: It's always a good idea to wear safety glasses to protect your eyes from any debris that might fly up during the installation process.
Step-by-Step Installation Guide
Now, let's get into the actual installation process. Here's a step-by-step guide on how to install cable management clips:
Step 1: Plan Your Layout
Before you start installing the clips, take some time to plan out where you want them to go. Measure the length of your cable tray and decide how many clips you'll need. You'll want to space the clips evenly along the length of the tray to ensure that the cables are properly supported.
As a general rule of thumb, you should space the clips about 12 to 18 inches apart. However, this can vary depending on the size and weight of your cables. If you're dealing with heavier cables, you might want to space the clips closer together.
Step 2: Prepare the Cable Tray
Once you've planned out your layout, it's time to prepare the cable tray for the installation. Clean the surface of the tray to remove any dirt, dust, or debris that might prevent the clips from adhering properly.
If the cable tray has any sharp edges or burrs, use a file or sandpaper to smooth them out. This will help prevent the cables from getting damaged when they're inserted into the clips.
Step 3: Attach the Clips
Now it's time to start attaching the clips to the cable tray. Depending on the type of clips you're using, you might need to use screws, adhesive, or a combination of both.


If you're using screw-mounted clips, align the clip with the pre-drilled holes in the cable tray and insert the screws. Use a screwdriver to tighten the screws securely, but be careful not to overtighten them, as this could damage the clip or the cable tray.
If you're using adhesive-mounted clips, apply the adhesive to the back of the clip and press it firmly onto the cable tray. Make sure the clip is aligned properly and that there are no air bubbles between the clip and the tray.
Step 4: Install the Cables
Once the clips are attached to the cable tray, it's time to install the cables. Carefully insert each cable into the clips, making sure they're properly seated and secured.
If you're dealing with multiple cables, you might want to use color-coded clips or labels to help you keep track of which cable is which. This can make it much easier to troubleshoot any issues that might arise in the future.
Step 5: Check the Installation
After you've installed all the cables, take a few minutes to check the installation. Make sure all the clips are securely attached to the cable tray and that the cables are properly seated in the clips.
Give the cables a gentle tug to make sure they're held firmly in place. If any of the clips seem loose or if the cables aren't properly secured, go back and make the necessary adjustments.
Other Useful Cable Tray Accessories
In addition to cable management clips, there are several other useful cable tray accessories that you might want to consider. For example, the Screw B-type Reducing Joint is a great accessory for connecting cable trays of different sizes. It allows you to easily reduce the size of the cable tray at a specific point, which can be useful in situations where you need to change the direction or size of the cable run.
The Four Sided Cable Tray Suspension Frame is another useful accessory. It provides additional support for the cable tray, especially in situations where the tray is carrying a heavy load. The frame is designed to be installed on all four sides of the cable tray, which helps distribute the weight evenly and prevent the tray from sagging.
And if you're looking for a more compact and lightweight suspension solution, the Hexagonal Cable Tray Suspension Frame might be a good option. It's designed to provide a stable and secure suspension for the cable tray while taking up less space than traditional suspension frames.
Conclusion
Installing cable management clips is a relatively simple process that can make a big difference in the organization and functionality of your cable tray system. By following the steps outlined in this guide, you should be able to install the clips quickly and easily.
If you have any questions or if you're interested in purchasing cable tray accessories, including cable management clips, feel free to reach out to us. We're here to help you find the right products for your needs and to provide you with the support and guidance you need to install them correctly.
References
- Electrical Installation Handbook, Schneider Electric
- Cable Tray Installation Guide, Generic Industry Standard