


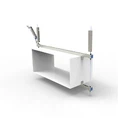


As a supplier of galvanized cable trays, ensuring the quality of our products is of utmost importance. Galvanized cable trays are widely used in various industries to support and organize electrical cables. Testing the quality of these cable trays is a multi - step process that involves several key aspects. In this blog, I will share with you how to test the quality of galvanized cable trays.
1. Visual Inspection
The first step in testing the quality of galvanized cable trays is a thorough visual inspection. This is a simple yet effective way to identify any obvious defects.
- Surface Finish: A high - quality galvanized cable tray should have a smooth and uniform surface finish. Check for any rough spots, bumps, or uneven coating. A good galvanized layer should cover the entire surface of the cable tray evenly. For example, on a Galvanized Ladder Type Cable Tray, the rungs and side rails should have a consistent appearance. Any signs of peeling, flaking, or blistering of the galvanized coating indicate poor quality.
- Color Consistency: The color of the galvanized coating should be consistent across the entire cable tray. A significant variation in color may suggest an improper galvanizing process. For instance, if one part of a Galvanized Trough Type Cable Tray appears darker or lighter than the rest, it could be a sign of uneven zinc deposition.
- Edge and Corner Inspection: Pay special attention to the edges and corners of the cable tray. These areas are more prone to damage during the manufacturing and handling processes. The edges should be smooth and free from sharp burrs, which could pose a safety hazard during installation and may also affect the integrity of the cables. Corners should be well - formed, and the galvanized coating should cover them completely.
2. Coating Thickness Measurement
The thickness of the galvanized coating is a crucial factor in determining the durability and corrosion resistance of the cable tray.
- Measurement Tools: There are several tools available for measuring the coating thickness, such as magnetic induction gauges and eddy - current gauges. These tools are non - destructive and can provide accurate measurements. For a Galvanized Tray Type Bridge, measure the coating thickness at multiple points on the surface, including the top, sides, and bottom.
- Industry Standards: Different industries have specific standards for the minimum coating thickness of galvanized cable trays. For example, in outdoor applications where the cable tray is exposed to harsh environmental conditions, a thicker coating is required. Generally, the coating thickness should be in the range of 50 - 100 microns, depending on the application and the expected service life. If the measured coating thickness is below the standard, the cable tray may not provide adequate corrosion protection.
3. Adhesion Test
The adhesion of the galvanized coating to the base metal is essential to ensure long - term performance.
- Cross - Cut Test: One common method to test the adhesion is the cross - cut test. Using a sharp blade, make a series of parallel cuts in the coating, followed by another set of cuts perpendicular to the first set, creating a grid pattern. Then, apply a piece of adhesive tape over the grid and pull it off sharply. If a significant amount of the coating comes off with the tape, it indicates poor adhesion.
- Bend Test: Another way to test adhesion is by bending the cable tray slightly. For a ladder - type cable tray, bend one of the rungs gently. If the galvanized coating cracks or peels during the bending process, it shows that the adhesion is not sufficient. A well - adhered coating should remain intact even under moderate stress.
4. Corrosion Resistance Test
Since one of the main advantages of galvanized cable trays is their corrosion resistance, it is necessary to test this property.
- Salt Spray Test: The salt spray test is a widely used method to evaluate the corrosion resistance of galvanized products. Place the cable tray sample in a salt spray chamber and expose it to a salt - water mist for a specified period, usually 24 - 1000 hours, depending on the standard requirements. After the test, examine the sample for signs of corrosion, such as rust spots. A high - quality galvanized cable tray should show minimal corrosion after the test.
- Immersion Test: Immerse the cable tray sample in a corrosive solution, such as a dilute acid or alkaline solution, for a certain period. Monitor the sample for any changes in appearance, such as discoloration or the formation of corrosion products. This test can simulate the effects of different environmental conditions on the cable tray.
5. Mechanical Strength Test
Galvanized cable trays need to have sufficient mechanical strength to support the weight of the cables and withstand the forces during installation and operation.
- Load - Bearing Test: Apply a specific load to the cable tray to test its load - bearing capacity. For a trough - type cable tray, place weights evenly on the tray to simulate the weight of the cables. Measure the deflection of the tray under the load. The deflection should be within the acceptable limits specified by the relevant standards. If the tray deflects too much, it may not be able to support the cables properly, which could lead to cable damage.
- Impact Resistance Test: Subject the cable tray to an impact force using a pendulum or a falling weight. This test simulates the accidental impact that the cable tray may experience during handling or in a real - world environment. After the impact, check for any cracks or deformation in the tray. A high - quality cable tray should be able to withstand a certain level of impact without significant damage.
6. Dimensional Accuracy Test
The dimensional accuracy of the cable tray is important for proper installation and compatibility with other components.
- Length, Width, and Height Measurement: Use a measuring tape or a caliper to measure the length, width, and height of the cable tray. Compare the measured values with the specified dimensions. Any significant deviation from the standard dimensions may cause problems during installation, such as improper fitting or interference with other equipment.
- Hole Size and Spacing: For cable trays with holes for cable routing or mounting, measure the size and spacing of the holes. The holes should be of the correct size to allow easy passage of the cables, and the spacing should be consistent to ensure proper alignment during installation.
In conclusion, testing the quality of galvanized cable trays involves a comprehensive approach that includes visual inspection, coating thickness measurement, adhesion test, corrosion resistance test, mechanical strength test, and dimensional accuracy test. By conducting these tests, we can ensure that our galvanized cable trays meet the highest quality standards and provide reliable performance in various applications.


If you are interested in purchasing high - quality galvanized cable trays, we are here to provide you with the best products and services. We welcome you to contact us for further information and to discuss your specific requirements. Our team of experts will be happy to assist you in finding the most suitable cable tray solutions for your projects.
References
- ASTM International standards for galvanized products
- ISO standards related to cable tray quality and testing
- Industry - specific guidelines for electrical cable tray installation and performance