


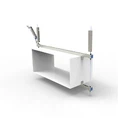


Hey there! As a supplier of spray-coated cable trays, I often get asked about how to paint over these trays. It's a common concern, especially when you want to change the color or give an old tray a fresh look. So, I'm here to share some tips and tricks on how to paint over a spray-coated cable tray.
Preparing for the Painting Process
First things first, you need to prep the cable tray properly. This step is crucial because it determines how well the new paint will adhere to the surface.
Cleaning the Tray
The very first thing you should do is clean the spray-coated cable tray thoroughly. Over time, dust, dirt, and grease can accumulate on the surface, which can prevent the new paint from sticking. You can use a mild detergent and warm water to clean the tray. A soft sponge or a cloth works great for this. Make sure to rinse it well and let it dry completely. You don't want any moisture trapped under the new paint, as it can cause bubbling and peeling.
Sanding the Surface
Once the tray is clean and dry, it's time to sand it. Sanding helps to create a rough surface for the new paint to grip onto. You can use fine-grit sandpaper, around 120 - 180 grit. Gently sand the entire surface of the cable tray, moving in the direction of the grain if there is any. Be careful not to sand too hard, as you don't want to damage the existing spray coating. Just create a slightly rough texture that will allow the new paint to bond better. After sanding, use a clean cloth to wipe away any dust.
Choosing the Right Paint
Now that the tray is prepped, it's time to choose the right paint. There are a few factors to consider when selecting paint for a cable tray.
Type of Paint
You'll want to choose a paint that is durable and can withstand the environment where the cable tray will be installed. For indoor cable trays, a high-quality enamel paint can work well. It dries to a hard, glossy finish that is resistant to scratches and stains. If the cable tray is going to be used outdoors, you'll need a paint that is weather-resistant. Look for paints that are labeled as suitable for exterior use, such as acrylic latex paints. These paints are flexible and can expand and contract with temperature changes without cracking.
Color and Finish
The color and finish of the paint are also important. You can choose a color that matches the decor of the area where the cable tray will be located or go for a bold color to make it stand out. As for the finish, you can opt for a matte, semi-gloss, or high-gloss finish. Matte finishes are less reflective and can give a more subtle look, while high-gloss finishes are shiny and easy to clean.
Applying the Paint
Primer
Before applying the final coat of paint, it's a good idea to use a primer. A primer helps to seal the surface and provides a better base for the paint. Choose a primer that is compatible with the type of paint you've selected. Apply the primer using a paintbrush or a spray gun, following the manufacturer's instructions. Make sure to apply an even coat and let it dry completely before moving on to the next step.
Painting
Once the primer is dry, you can start applying the paint. If you're using a paintbrush, choose a high-quality brush with synthetic bristles. Dip the brush into the paint and remove any excess by tapping it on the side of the paint can. Start painting in small sections, using long, smooth strokes. Work in the direction of the grain or in a consistent pattern to ensure an even finish. If you're using a spray gun, hold it about 8 - 12 inches away from the surface of the cable tray and move it in a steady, back-and-forth motion. Apply thin coats of paint, allowing each coat to dry before applying the next one. Multiple thin coats are better than one thick coat, as they are less likely to drip and will provide a more even finish.
Curing and Drying
After applying the paint, the cable tray needs to cure and dry properly. Follow the manufacturer's instructions on the paint can for the recommended drying and curing times. Generally, it can take a few hours for the paint to dry to the touch, but it may take several days for it to fully cure. During this time, make sure to keep the cable tray in a well-ventilated area and avoid touching or moving it too much.
Different Types of Spray-Coated Cable Trays
As a supplier, I offer a variety of spray-coated cable trays, such as Spraying Cable Tray, Spray Molded Trough Type Cable Tray, and Spray Tray Type Cable Tray. Each type has its own unique features and benefits, and the painting process may vary slightly depending on the type of tray.
Contact for Purchase and Consultation
If you're in the market for spray-coated cable trays or have any questions about painting them, feel free to reach out. We're here to help you find the right solution for your needs. Whether you're a contractor, an electrician, or a business owner, we can provide you with high-quality cable trays and expert advice.


References
- "Painting Metal Surfaces: A Guide", DIY Home Improvement Magazine
- Manufacturer's Instructions for Paint and Primer Products