


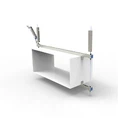


As a seasoned supplier of galvanized cable trays, I've witnessed firsthand the growing demand for these reliable and durable solutions in various industries. Galvanized cable trays are essential for organizing, supporting, and protecting electrical cables and wiring systems. In this blog post, I'll share a comprehensive guide on how to install galvanized cable trays, ensuring you have all the knowledge you need to complete the task efficiently and safely.
Pre-Installation Preparation
Before you start the installation process, it's crucial to conduct a thorough site assessment. This involves identifying the route where the cable tray will be installed, taking into account factors such as the location of electrical equipment, the number and size of cables to be accommodated, and any potential obstacles or hazards. Make sure to measure the length and width of the installation area accurately to determine the appropriate quantity and size of cable trays required.
Another important aspect of pre-installation preparation is to gather all the necessary tools and materials. You'll typically need items such as a drill, screwdriver, level, tape measure, cable ties, and appropriate fasteners. It's also essential to ensure that the galvanized cable trays you've purchased are of high quality and meet the relevant industry standards. As a supplier, I recommend considering different types of galvanized cable trays, such as Galvanized Ladder Type Cable Tray, Galvanized Trough Type Cable Tray, and Galvanized Tray Type Bridge, depending on your specific requirements.
Installation Steps
Step 1: Mounting Brackets Installation
The first step in installing a galvanized cable tray is to mount the brackets. These brackets will provide support for the cable tray and ensure its stability. Start by marking the locations where the brackets will be installed on the wall, ceiling, or floor, following the measurements and layout determined during the site assessment. Use a level to ensure that the marks are straight and evenly spaced.
Once the marks are in place, drill holes at the marked locations and insert appropriate wall plugs or anchors. Then, attach the brackets to the wall, ceiling, or floor using screws or bolts, making sure they are securely fastened. Check the levelness of the brackets again to ensure they are properly aligned.
Step 2: Assembling the Cable Tray
After the brackets are installed, it's time to assemble the galvanized cable tray. Most cable trays come in sections that need to be joined together. Start by laying out the sections on the brackets and aligning them properly. Use the provided connectors or fasteners to join the sections securely, ensuring a tight fit.
When connecting the sections, make sure to follow the manufacturer's instructions carefully. Some cable trays may require specific tools or techniques for assembly. If you encounter any difficulties during the assembly process, don't hesitate to contact the supplier for assistance.


Step 3: Securing the Cable Tray to the Brackets
Once the cable tray is assembled, it needs to be secured to the brackets. Use appropriate fasteners, such as clips or bolts, to attach the cable tray to the brackets at regular intervals. Make sure the fasteners are tightened properly to prevent the cable tray from moving or shifting.
During this step, it's also important to check the alignment of the cable tray again to ensure it is straight and level. Any misalignment can cause stress on the cables and affect the overall performance of the system.
Step 4: Installing Cable Supports
To further support the cables and prevent them from sagging, you may need to install cable supports along the length of the cable tray. These supports can be in the form of cable ties, clamps, or holders.
Start by placing the cable supports at regular intervals along the cable tray, following the manufacturer's recommendations. Then, use the cable ties or clamps to attach the cables to the supports, making sure they are evenly spaced and properly secured.
Step 5: Cable Installation
Once the cable tray and supports are in place, it's time to install the cables. Start by routing the cables through the cable tray, following the designated path and avoiding any sharp bends or kinks. Use cable ties or clamps to secure the cables to the tray and supports at regular intervals.
When installing the cables, make sure to label them clearly to facilitate future maintenance and troubleshooting. You can use cable markers or labels to identify the cables by their function, destination, or other relevant information.
Post-Installation Checks
After the installation is complete, it's important to conduct a thorough inspection to ensure everything is in working order. Check the cable tray for any signs of damage or misalignment, and make sure all the fasteners are tightened properly. Inspect the cables for any signs of wear or damage, and ensure they are properly supported and secured.
It's also a good idea to test the electrical system to ensure it is functioning correctly. This may involve checking the continuity of the cables, testing the electrical connections, and verifying the operation of the equipment. If you encounter any issues during the post-installation checks, make sure to address them promptly to avoid any potential problems in the future.
Conclusion
Installing a galvanized cable tray is a relatively straightforward process, but it requires careful planning, preparation, and attention to detail. By following the steps outlined in this guide and using high-quality materials and tools, you can ensure a successful installation that will provide reliable support and protection for your electrical cables and wiring systems.
If you're in the market for galvanized cable trays or need further assistance with your installation, I encourage you to reach out to us. As a trusted supplier, we offer a wide range of high-quality galvanized cable trays, including Galvanized Ladder Type Cable Tray, Galvanized Trough Type Cable Tray, and Galvanized Tray Type Bridge. Our team of experts is always ready to help you find the right solution for your specific needs and provide you with the support and guidance you need to ensure a successful installation.
References
- Electrical Installation Handbook, Schneider Electric
- National Electrical Code (NEC), National Fire Protection Association (NFPA)
- Cable Tray Installation Guide, Various Manufacturers