


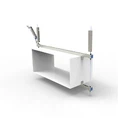


Hey there! As a supplier of polymer cable trays, I often get asked about how to install crosses for these trays. It's a crucial part of setting up a cable management system, and getting it right can save you a lot of headaches down the line. So, let's dive into the process and break it down step by step.
Why Install Crosses for Polymer Cable Trays?
Before we get into the installation process, let's quickly talk about why you might need to install crosses. Crosses are used to connect different sections of cable trays at intersections. They allow cables to change directions smoothly and provide a stable structure for the cables to rest on. This is especially important in large-scale installations where cables need to be routed in multiple directions.


Types of Polymer Cable Trays
There are several types of polymer cable trays available in the market, and each type might require a slightly different approach when it comes to installing crosses. The main types are:
- Polymer Ladder Type Cable Tray: This type of tray has a ladder-like structure, which is great for supporting large cables and allowing for good ventilation.
- Polymer Tray Type Cable Tray: Tray type cable trays are more enclosed and are suitable for protecting cables from dust, dirt, and other environmental factors.
- Polymer Trough Type Cable Tray: Trough type trays are fully enclosed and provide the highest level of protection for cables.
Tools and Materials You'll Need
Before you start the installation process, make sure you have all the necessary tools and materials. Here's a list of what you'll typically need:
- Measuring tape
- Drill
- Screwdriver
- Wrenches
- Cross connectors (make sure they are compatible with your polymer cable trays)
- Screws or bolts
- Safety equipment (gloves, safety glasses, etc.)
Step-by-Step Installation Process
Step 1: Plan Your Installation
The first step is to plan out where you want to install the crosses. Measure the distance between the sections of cable trays that you want to connect and mark the locations on the trays. Make sure to take into account the size and type of cables that will be running through the trays, as this will affect the placement of the crosses.
Step 2: Prepare the Cable Trays
Once you have marked the locations, you need to prepare the cable trays for installation. This might involve drilling holes in the trays if the cross connectors require screws or bolts for attachment. Make sure the holes are the right size and are drilled in the correct locations.
Step 3: Install the Cross Connectors
Now it's time to install the cross connectors. Place the cross connector over the marked location on the cable trays and align the holes. If you're using screws, insert them through the holes and tighten them with a screwdriver. If you're using bolts, insert the bolts through the holes and secure them with nuts using a wrench. Make sure the connectors are firmly attached to the trays.
Step 4: Check the Alignment
After installing the cross connectors, check the alignment of the cable trays. Make sure they are level and that the crosses are properly aligned. This will ensure that the cables can run smoothly through the trays without any kinks or bends.
Step 5: Secure the Cables
Once the crosses are installed and the trays are aligned, you can start securing the cables to the trays. Use cable ties or other appropriate fasteners to keep the cables in place. Make sure the cables are not overcrowded and that there is enough space for ventilation.
Tips for a Successful Installation
- Read the Manufacturer's Instructions: Always read the manufacturer's instructions for both the cable trays and the cross connectors. This will ensure that you are installing them correctly and that you are using the right tools and materials.
- Use the Right Connectors: Make sure the cross connectors you are using are compatible with your polymer cable trays. Using the wrong connectors can lead to a weak or unstable installation.
- Take Your Time: Installation is not a race. Take your time to measure, mark, and install the crosses correctly. This will save you time and money in the long run by avoiding costly mistakes.
- Test the Installation: Before you start running cables through the trays, test the installation to make sure everything is working properly. Check for any loose connections or misalignments.
Conclusion
Installing crosses for polymer cable trays is not as complicated as it might seem. By following the steps outlined in this blog post and using the right tools and materials, you can ensure a successful installation. If you have any questions or need further assistance, don't hesitate to reach out. We're here to help you with all your polymer cable tray needs.
If you're interested in purchasing polymer cable trays or cross connectors, we'd love to hear from you. Contact us to discuss your requirements and get a quote. We offer high-quality products at competitive prices and excellent customer service.
References
- Manufacturer's manuals for polymer cable trays and cross connectors.
- Industry standards for cable tray installation.