


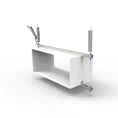


As a trusted supplier of polymer cable trays, I understand the importance of proper installation to ensure the safety and efficiency of your electrical systems. Couplings are crucial components in the installation of polymer cable trays, as they connect individual sections of the tray together, providing a continuous and secure pathway for cables. In this blog post, I will guide you through the process of installing couplings for polymer cable trays, step by step.
Understanding Polymer Cable Trays
Before we dive into the installation process, let's briefly discuss the different types of polymer cable trays available. At our company, we offer a variety of polymer cable trays, including Polymer Ladder Type Cable Tray, Polymer Trough Type Cable Tray, and Polymer Tray Type Cable Tray. Each type has its own unique features and benefits, making them suitable for different applications.
- Polymer Ladder Type Cable Tray: This type of cable tray consists of a series of horizontal rungs connected by vertical side rails, resembling a ladder. It is ideal for supporting heavy cables and provides excellent ventilation, reducing the risk of overheating.
- Polymer Trough Type Cable Tray: The trough type cable tray has a solid bottom and sidewalls, providing a fully enclosed pathway for cables. It is suitable for protecting cables from dust, dirt, and moisture, making it ideal for indoor and outdoor applications.
- Polymer Tray Type Cable Tray: The tray type cable tray is similar to the trough type, but with perforations or slots in the bottom and sidewalls. This allows for better ventilation and drainage, making it suitable for applications where heat dissipation is a concern.
Tools and Materials Required
Before you begin the installation process, make sure you have the following tools and materials on hand:


- Polymer cable trays and couplings
- Measuring tape
- Drill
- Screwdriver
- Wrench
- Safety glasses
- Gloves
Step-by-Step Installation Guide
Step 1: Prepare the Cable Trays
- Start by measuring the length of the area where the cable tray will be installed. Cut the polymer cable trays to the appropriate length using a saw or a cable tray cutter. Make sure to wear safety glasses and gloves to protect yourself from sharp edges.
- Clean the ends of the cable trays to remove any debris or dirt. This will ensure a proper connection between the trays and the couplings.
Step 2: Position the Cable Trays
- Place the first section of the cable tray in the desired location. Make sure it is level and aligned with the mounting surface. Use a measuring tape to ensure that the tray is properly positioned.
- Secure the cable tray to the mounting surface using screws or bolts. Make sure the tray is firmly attached to prevent it from moving during the installation process.
Step 3: Install the Couplings
- Take a coupling and place it over the ends of two adjacent cable trays. Make sure the coupling is centered and aligned with the trays.
- Insert the screws or bolts through the holes in the coupling and the cable trays. Tighten the screws or bolts using a screwdriver or a wrench. Make sure the coupling is securely attached to the trays.
- Repeat this process for each coupling, connecting all the sections of the cable tray together.
Step 4: Check the Alignment
- Once all the couplings are installed, check the alignment of the cable tray. Make sure the trays are straight and level. Use a measuring tape to check the distance between the trays and ensure that they are evenly spaced.
- If necessary, adjust the position of the trays or the couplings to ensure a proper alignment.
Step 5: Secure the Cable Tray
- After checking the alignment, secure the cable tray to the mounting surface at regular intervals. Use screws or bolts to attach the tray to the mounting brackets or the wall.
- Make sure the cable tray is firmly attached to prevent it from sagging or moving.
Step 6: Install the Accessories
- Depending on your specific requirements, you may need to install additional accessories such as bends, tees, or reducers. Follow the manufacturer's instructions for installing these accessories.
- Make sure the accessories are properly aligned and connected to the cable tray.
Step 7: Inspect the Installation
- Once the installation is complete, inspect the cable tray and the couplings for any signs of damage or loose connections. Make sure all the screws or bolts are tightened properly.
- Check the alignment of the cable tray and ensure that it is straight and level. If you notice any issues, make the necessary adjustments.
Step 8: Test the Cable Tray
- Before you start installing the cables, test the cable tray to ensure that it is functioning properly. You can do this by running a cable through the tray and checking for any obstructions or interference.
- Make sure the cable can move freely through the tray without any resistance.
Tips for a Successful Installation
- Read the manufacturer's instructions carefully before starting the installation process. This will ensure that you follow the correct procedures and use the appropriate tools and materials.
- Use the right type of coupling for the specific type of cable tray you are installing. Different types of cable trays may require different types of couplings.
- Make sure the cable trays and the couplings are clean and free from debris before installation. This will ensure a proper connection and prevent any issues with the installation.
- Use the correct size of screws or bolts for the coupling and the cable tray. Using the wrong size can result in a loose connection or damage to the tray.
- Tighten the screws or bolts evenly to ensure a secure connection. Over-tightening can damage the cable tray or the coupling, while under-tightening can result in a loose connection.
- If you are installing the cable tray in a high-traffic area or in an environment where it may be subject to vibration or movement, consider using additional support brackets or clamps to secure the tray.
- If you are unsure about any aspect of the installation process, consult a professional electrician or a cable tray installation expert.
Conclusion
Installing couplings for polymer cable trays is a relatively straightforward process, but it requires careful planning and attention to detail. By following the steps outlined in this blog post and using the right tools and materials, you can ensure a successful installation that provides a safe and reliable pathway for your cables.
If you have any questions or need further assistance with the installation of polymer cable trays or couplings, please do not hesitate to contact us. As a leading supplier of polymer cable trays, we have the expertise and experience to help you find the right solution for your specific needs. We look forward to working with you and helping you achieve your electrical installation goals.
References
- Manufacturer's installation guides for polymer cable trays and couplings.
- Industry standards and best practices for cable tray installation.