


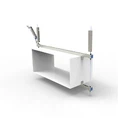


Installing cable trays in a sloping area can be a bit tricky, but with the right know - how and the right products, it can be done smoothly. As a galvanized cable tray supplier, I've seen my fair share of these installations, and I'm here to share some tips on how to get it right.
Planning the Installation
Before you even start with the actual installation, a solid plan is crucial. First off, you need to survey the sloping area. Measure the angle of the slope accurately. This will determine how you'll install the cable trays and what additional support structures you might need.
You also need to consider the type of cables that will be placed in the trays. Different cables have different weights and bend radii. For instance, heavy - duty power cables might require stronger and more robust cable trays compared to lightweight communication cables.
Another important aspect of planning is to identify any potential obstacles in the area. This could be pipes, ducts, or other structural elements. You need to make sure that the cable trays won't interfere with these existing structures.
Choosing the Right Galvanized Cable Trays
As a galvanized cable tray supplier, I can tell you that there are several types of galvanized cable trays available, each suitable for different applications.
- Galvanized Tray Type Bridge: This type of cable tray is great for general - purpose use. It offers a flat surface for cables to rest on and is relatively easy to install. You can find more information about Galvanized Tray Type Bridge. It's a popular choice for both indoor and outdoor installations in sloping areas as it can handle a moderate amount of cable load.
- Galvanized Ladder Type Cable Tray: If you have a large number of cables or if you need better ventilation for the cables, the Galvanized Ladder Type Cable Tray is a good option. The open - rung design allows for air circulation, which can help prevent overheating of the cables. It's also strong enough to support heavy cable loads on a slope.
- Galvanized Trough Type Cable Tray: For applications where you need to protect the cables from dust, debris, or water, the Galvanized Trough Type Cable Tray is the way to go. It has a closed - top design that provides excellent protection. This type of tray is often used in industrial settings or in areas where environmental conditions are harsh.
Preparing the Installation Site
Once you've planned and chosen the right cable trays, it's time to prepare the installation site. Clean the area thoroughly to remove any dirt, debris, or loose materials. This will ensure that the mounting brackets or supports will have a solid surface to attach to.
Mark the locations where the cable trays will be installed. Use a level and a measuring tape to ensure that the marks are accurate. If the slope is significant, you might need to use a laser level to get precise measurements.
Installing the Mounting Supports
The mounting supports are crucial for the stability of the cable trays in a sloping area. You need to install them at regular intervals along the slope. The spacing of the supports will depend on the type of cable tray, the weight of the cables, and the angle of the slope.


For a gentle slope, you can space the supports further apart. However, for a steeper slope, you'll need to place the supports closer together. Make sure that the supports are firmly attached to the surface. You can use bolts, screws, or welding, depending on the structure of the area.
Installing the Galvanized Cable Trays
Now comes the fun part - installing the cable trays. Start at the bottom of the slope and work your way up. Make sure that the cable trays are aligned properly with the mounting supports. Use appropriate fasteners to attach the cable trays to the supports.
If you're using multiple sections of cable trays, you need to connect them securely. You can use coupling plates or other connection methods recommended by the manufacturer. Check for any gaps or misalignments between the sections and correct them before proceeding.
Securing the Cables
After the cable trays are installed, it's time to place the cables in them. Secure the cables at regular intervals to prevent them from moving or sliding down the slope. You can use cable ties, clamps, or other cable management accessories.
Make sure that the cables are organized neatly in the trays. Group similar types of cables together and label them if necessary. This will make it easier for future maintenance and troubleshooting.
Testing and Inspection
Once the cables are installed, it's important to test them to make sure they're working properly. Check for any electrical shorts, signal interference, or other issues. You should also inspect the cable trays and the mounting supports for any signs of damage or instability.
If you find any problems, fix them immediately. This could involve tightening loose fasteners, realigning the cable trays, or replacing damaged components.
Maintenance
Regular maintenance is essential to keep the cable trays and the cables in good condition. Inspect the galvanized cable trays for signs of corrosion, especially in outdoor or humid environments. If you notice any rust spots, you can touch - up the galvanized coating.
Check the cable management accessories and replace any that are worn out or damaged. Also, make sure that the cables are still properly secured and organized.
In conclusion, installing cable trays in a sloping area requires careful planning, the right choice of products, and proper installation techniques. As a galvanized cable tray supplier, I'm here to help you with all your cable tray needs. If you're interested in purchasing galvanized cable trays for your project, feel free to reach out for a detailed discussion and procurement negotiation. We can work together to find the best solutions for your specific requirements.
References
- Electrical Installation Handbook, Schneider Electric
- Cable Tray Installation Guide, Various Industry Publications