


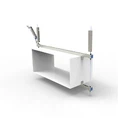


Hey there! As a supplier of polymer cable trays, I often get asked about how to install brackets for these trays. It's a crucial step that can make or break the functionality and safety of your cable management system. So, let's dive right into it and explore the ins and outs of installing brackets for polymer cable trays.
Why Brackets Matter
First off, why do we even need brackets for polymer cable trays? Well, brackets serve as the backbone of the entire cable tray system. They provide support, stability, and proper alignment for the trays. Without well - installed brackets, the cable trays could sag, shift, or even collapse under the weight of the cables. This not only poses a risk to the cables themselves but can also create safety hazards in the workplace.


Types of Polymer Cable Trays
Before we get into the installation process, it's important to know about the different types of polymer cable trays available. We offer Polymer Trough Type Cable Tray, Polymer Ladder Type Cable Tray, and Polymer Tray Type Cable Tray. Each type has its own unique characteristics and installation requirements, but the basic principles of bracket installation remain the same.
Tools and Materials You'll Need
To install brackets for polymer cable trays, you'll need a few essential tools and materials:
- Measuring tape: To ensure accurate placement of the brackets.
- Drill: For making holes in the mounting surface.
- Screwdriver: To tighten the screws.
- Brackets: Make sure you have the right type and size of brackets for your cable trays.
- Screws: Appropriate screws for the mounting surface (e.g., concrete screws for concrete walls, wood screws for wooden structures).
- Level: To ensure the brackets are installed horizontally and vertically.
Step - by - Step Installation Process
Step 1: Planning and Measurement
The first step is to plan out where you want to install the cable trays and brackets. Measure the length and width of the area where the trays will be installed. Decide on the spacing between the brackets. As a general rule of thumb, brackets should be spaced no more than 3 feet apart for light - duty applications and no more than 2 feet apart for heavy - duty applications. Use a measuring tape to mark the locations of the brackets on the mounting surface.
Step 2: Prepare the Mounting Surface
The mounting surface needs to be clean and free of any debris or loose material. If you're installing the brackets on a concrete wall, you may need to use a hammer drill to create holes for the screws. For a wooden surface, a regular drill will do the job. Make sure the holes are the right size for the screws you'll be using.
Step 3: Install the Brackets
Once the holes are ready, it's time to install the brackets. Place the bracket against the mounting surface at the marked location. Insert the screws through the holes in the bracket and into the holes in the mounting surface. Use a screwdriver to tighten the screws. Make sure the bracket is firmly attached to the mounting surface. Use a level to check if the bracket is horizontal or vertical, depending on the orientation of the cable tray. Adjust the bracket if necessary.
Step 4: Repeat for All Brackets
Repeat the process for all the brackets you need to install. Make sure the spacing between the brackets is consistent. This will ensure that the cable trays are evenly supported.
Step 5: Install the Polymer Cable Trays
After all the brackets are installed, it's time to install the polymer cable trays. Place the trays on top of the brackets and align them properly. Some trays may come with pre - drilled holes that can be used to attach them to the brackets. Use screws or other appropriate fasteners to secure the trays to the brackets.
Tips and Tricks
- When drilling holes in the mounting surface, wear safety goggles to protect your eyes from debris.
- If you're installing brackets in a high - traffic area, consider using additional support or reinforcement to prevent damage.
- Before installing the cable trays, double - check the alignment and level of the brackets. It's easier to make adjustments at this stage than after the trays are installed.
Troubleshooting
Sometimes, things don't go as planned during the installation process. Here are some common problems and how to solve them:
- If the brackets are not level, loosen the screws slightly and adjust the bracket using a level. Then tighten the screws again.
- If the holes in the mounting surface are too big for the screws, you can use larger screws or fill the holes with epoxy or other suitable filler and redrill them.
- If the cable trays don't fit properly on the brackets, check the dimensions of the trays and brackets. You may need to replace the brackets or adjust the trays.
Conclusion
Installing brackets for polymer cable trays is not overly complicated, but it does require careful planning and attention to detail. By following the steps outlined above, you can ensure a safe and reliable cable management system. If you have any questions or need further assistance with the installation process, don't hesitate to reach out. We're here to help you make the most of our polymer cable trays. Whether you're working on a small - scale project or a large industrial installation, we've got the products and expertise to meet your needs.
If you're interested in purchasing polymer cable trays or have any inquiries about our products, feel free to contact us for a quote or to discuss your specific requirements. We look forward to working with you on your next project!
References
- Cable Tray Installation Handbook. A comprehensive guide on cable tray installation techniques.
- Polymer Materials for Electrical Applications. A research paper on the properties and uses of polymers in cable management.