


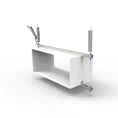


Customizing a pressing block can be a crucial process for many industries, especially when standard off - the - shelf options do not meet specific requirements. As a pressing block supplier, I have witnessed firsthand the diverse needs of our clients and the importance of a well - customized pressing block. In this blog, I will guide you through the steps of customizing a pressing block, from understanding your needs to the final product.
Step 1: Define Your Requirements
The first and most critical step in customizing a pressing block is to clearly define your requirements. This involves considering several factors:
Application
Understand the specific application for which the pressing block will be used. Is it for a manufacturing process, such as stamping or molding? Or perhaps it is for a packaging application, like holding products in place during shipping. Different applications will have different demands on the pressing block. For example, a pressing block used in a high - temperature molding process will need to be made of a material that can withstand extreme heat.
Pressure and Force
Determine the amount of pressure and force the pressing block will need to exert. This will depend on the nature of the task. If you are pressing a soft material, a lower pressure may be sufficient. However, for more rigid materials, a higher pressure will be required. Consider the maximum and minimum pressure levels that the block will encounter during its operation.
Size and Shape
The size and shape of the pressing block are also important. Measure the area where the block will be used and consider any space constraints. The shape should be designed to fit the specific task. For instance, if you need to press a circular object, a round - shaped pressing block may be more appropriate. You can also refer to our Edge Pressing Block and Medium Pressure Block for some inspiration on different shapes and sizes available.
Material Compatibility
Think about the materials that the pressing block will come into contact with. Some materials may react with certain types of pressing block materials, causing damage or contamination. For example, if you are working with food products, you will need a pressing block made of a food - grade material that is non - toxic and easy to clean.
Step 2: Choose the Right Material
Once you have defined your requirements, the next step is to choose the right material for your pressing block. There are several materials available, each with its own advantages and disadvantages:
Metal
Metals such as steel, aluminum, and brass are commonly used for pressing blocks. Steel is strong and durable, making it suitable for high - pressure applications. Aluminum is lightweight and corrosion - resistant, which is ideal for applications where weight is a concern. Brass has good machinability and is often used for precision pressing tasks.
Plastic
Plastics like nylon, polycarbonate, and polyethylene are also popular choices. Nylon is strong, wear - resistant, and has good chemical resistance. Polycarbonate is transparent and has high impact strength, which can be useful for applications where visibility is required. Polyethylene is flexible and has a low coefficient of friction, making it suitable for applications where smooth movement is needed.
Rubber
Rubber pressing blocks are often used when a soft and flexible pressing surface is required. They can conform to irregular shapes and provide a gentle but effective pressing force. Rubber also has good shock - absorbing properties, which can be beneficial in applications where vibration needs to be reduced.
Step 3: Design the Pressing Block
After selecting the material, it's time to design the pressing block. This step involves creating a detailed blueprint or 3D model of the block.
CAD Design
Use computer - aided design (CAD) software to create a precise design of the pressing block. This allows you to visualize the final product and make any necessary adjustments before manufacturing. You can include details such as dimensions, holes, grooves, and any other features that are required for your application.
Prototyping
Once the design is complete, it is a good idea to create a prototype of the pressing block. This can be done using 3D printing or other rapid prototyping techniques. A prototype allows you to test the design in real - world conditions and make any final modifications before mass production.


Step 4: Select a Manufacturing Process
There are several manufacturing processes available for producing pressing blocks, and the choice depends on the material, design complexity, and production volume:
Machining
Machining is a common method for producing pressing blocks, especially from metal materials. It involves using cutting tools to remove material from a solid block to create the desired shape. Machining can produce high - precision parts but may be more expensive for large - volume production.
Molding
Molding is a suitable process for producing pressing blocks from plastic and rubber materials. It involves pouring the material into a mold and allowing it to solidify. Molding can be cost - effective for large - volume production but may have limitations in terms of design complexity.
Casting
Casting is another option for producing metal pressing blocks. It involves pouring molten metal into a mold and allowing it to cool and solidify. Casting can produce complex shapes but may require more time and resources compared to other processes.
Step 5: Quality Control
Quality control is an essential part of the customization process. Ensure that the pressing blocks meet your specifications and quality standards:
Inspection
Conduct thorough inspections of the pressing blocks during and after the manufacturing process. Check for dimensions, surface finish, and any defects. Use measuring tools such as calipers, micrometers, and surface roughness testers to ensure accuracy.
Testing
Test the pressing blocks under real - world conditions to ensure that they perform as expected. This may involve applying the required pressure and force and checking for any signs of wear or damage. You can also perform other tests such as hardness testing, material analysis, and fatigue testing.
Step 6: Finalize the Order
Once you are satisfied with the quality of the pressing blocks, it's time to finalize the order. Provide clear instructions to the manufacturer regarding the quantity, delivery time, and any other requirements.
Conclusion
Customizing a pressing block is a multi - step process that requires careful planning and attention to detail. By following these steps, you can ensure that you get a pressing block that meets your specific needs. As a pressing block supplier, we are committed to providing high - quality customized pressing blocks to our clients. If you have any questions or need assistance with customizing a pressing block, please feel free to contact us for further discussion and procurement.
References
- "Materials Science and Engineering: An Introduction" by William D. Callister Jr. and David G. Rethwisch
- "Manufacturing Engineering and Technology" by S. Kalpakjian and S. R. Schmid